Key Points
- ✓ Tenebrous Isle has 7 distinct areas: Ossex hub + 6 dungeons
- ✓ All areas can be explored in any order - fully non-linear
- ✓ Ossex provides shops, Underlabs, and fast travel options
- ✓ Each dungeon has unique mechanics and boss encounter
- ✓ No ability gates or required sequence - explore freely
Tenebrous Isle
The dark and mysterious game world
The World of Tenebrous Isle
Tenebrous Isle is a gothic, interconnected open world that serves as the setting for Mina the Hollower. The island is divided into 7 distinct areas, each with its own unique theme, enemies, and challenges. Unlike traditional Metroidvanias, the game is fully non-linear -- there are no item gates or required sequence breaks. You can tackle any area in any order you choose.
The central hub town of Ossex connects to all other areas and provides essential services including shops, save points, and story progression through the in-game newspaper. As you explore deeper into the isle, you will uncover shortcuts, secrets, and lore that paint a picture of the island's dark history.
Main Objective: Mina must repair 6 Spark Generators located throughout the island's dungeons. These generators were designed to bring electricity and prosperity to Tenebrous Isle, but have fallen into disrepair. As Mina investigates, she discovers darker secrets about the generators' true purpose and the forces that seek to control them.
Non-Linear Exploration
The 6 dungeon areas beyond Ossex can be tackled in any order. There are no ability locks or required items to access any area. Feel free to explore wherever interests you, and return to tougher areas after gaining more power through upgrades.
All Areas
Detailed guides for each region of Tenebrous Isle
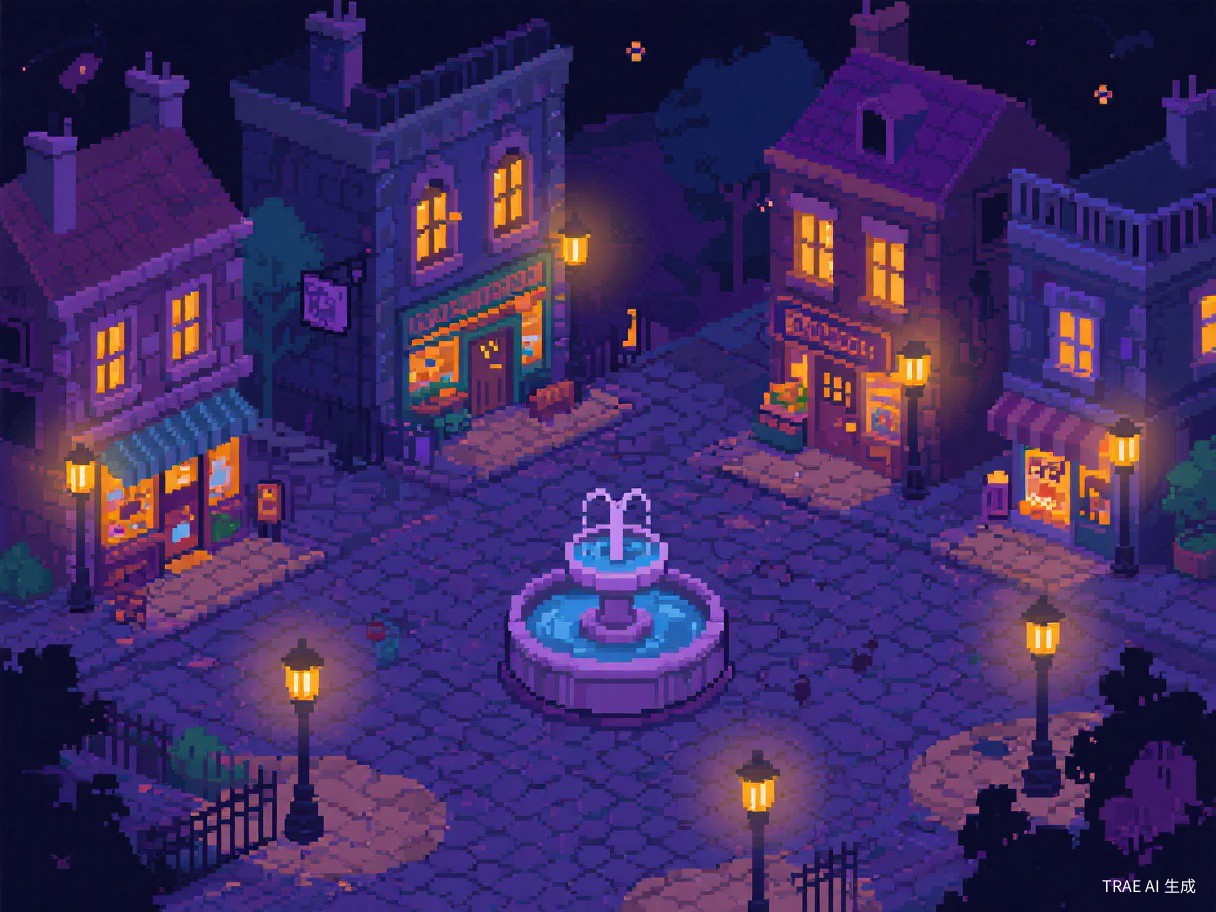 Central Hub Town
Ossex
Central HubOssex serves as your home base and the central hub of Tenebrous Isle. This gloomy settlement is where you will find all the essential services for your adventure: shops for buying and upgrading weapons, a Trinket merchant, consumable vendors, and access to the Underlabs where you spend Bones on permanent stat boosts. The town also publishes a newspaper that dishes out lore snippets, gameplay hints, and updates as you progress through the story.
From Ossex, pathways branch out to every one of the six dungeon regions, so it is the natural place to return to whenever you need to restock supplies, spend your Bones, or plan your next destination.
Shops & Services
General Store
"Purchase items here, but be careful - the price of the next item will increase."
Trinket Shop
"The many headed weirdo sells Trinkets. If you have more Trinkets, she may show you her special collection."
Weapon Shop
"Buy weapons here. You get a discount on the first one!"
Kear Institute (Key Shop)
Located east of central Ossex, next to the Emporium. Talk to the blue bird Kearnes to purchase up to 9 Kears (keys). First key costs 300 Bones, with each subsequent key increasing in price. Kears are required to unlock certain paths and treasure chests throughout Tenebrous Isle. Always carry at least 2 keys before leaving Ossex.
Emporium (Upgrade Shop)
Located west of central Ossex, next to the Kear Institute. The most important shop in Ossex. Purchase permanent upgrades: Spark Container (extra revival chance), Life Rose (max HP increase), Flask Satchel (more Plasma bottles), Spark, Joules, and Trinket Slots. Priority: Spark Container first, then Life Rose and Flask Satchel.
Kear Shop
"Kears make the world go round and unlock all sorts of things. Buy them here from preeminent Kear economists."
Pawn Shop
"If you don't want an item or need some quick Bones, you could always pawn some of your stuff. You could always buy it back later!"
Train Station
"The train would let you travel quickly, but it's out of commission, and getting a new train car won't be cheap."
Tavern
"Locals just love the tavern. Go have a good time, why don't ya!"
Tips for Ossex
- Check the newspaper regularly for new hints and shop inventory updates
- The Pawn Shop lets you sell unwanted items for Bones and buy them back later
- The Train Station provides fast travel once you acquire new train cars
- The Trinket Shop vendor may show special collections if you own more Trinkets
- General Store prices increase with each purchase - plan your buying accordingly
- Weapon Shop offers a discount on your first weapon purchase
Bowery District (West Ossex)
The Bowery is a sub-area located on the west side of Ossex. This district contains the Music Hall and is home to the NPC Brandish (who transforms into his alternate personality Holden after your Sidearms skill reaches Level 5). Holden sells the Dual Sidearm License for 2,000 Bones, which unlocks a second sidearm slot for carrying two sidearms simultaneously.
- ▶ Contains the Music Hall landmark
- ▶ Brandish/Holden NPC found above the Music Hall
- ▶ Dual Sidearm License available after Sidearms Level 5
- ▶ Cost: 2,000 Bones
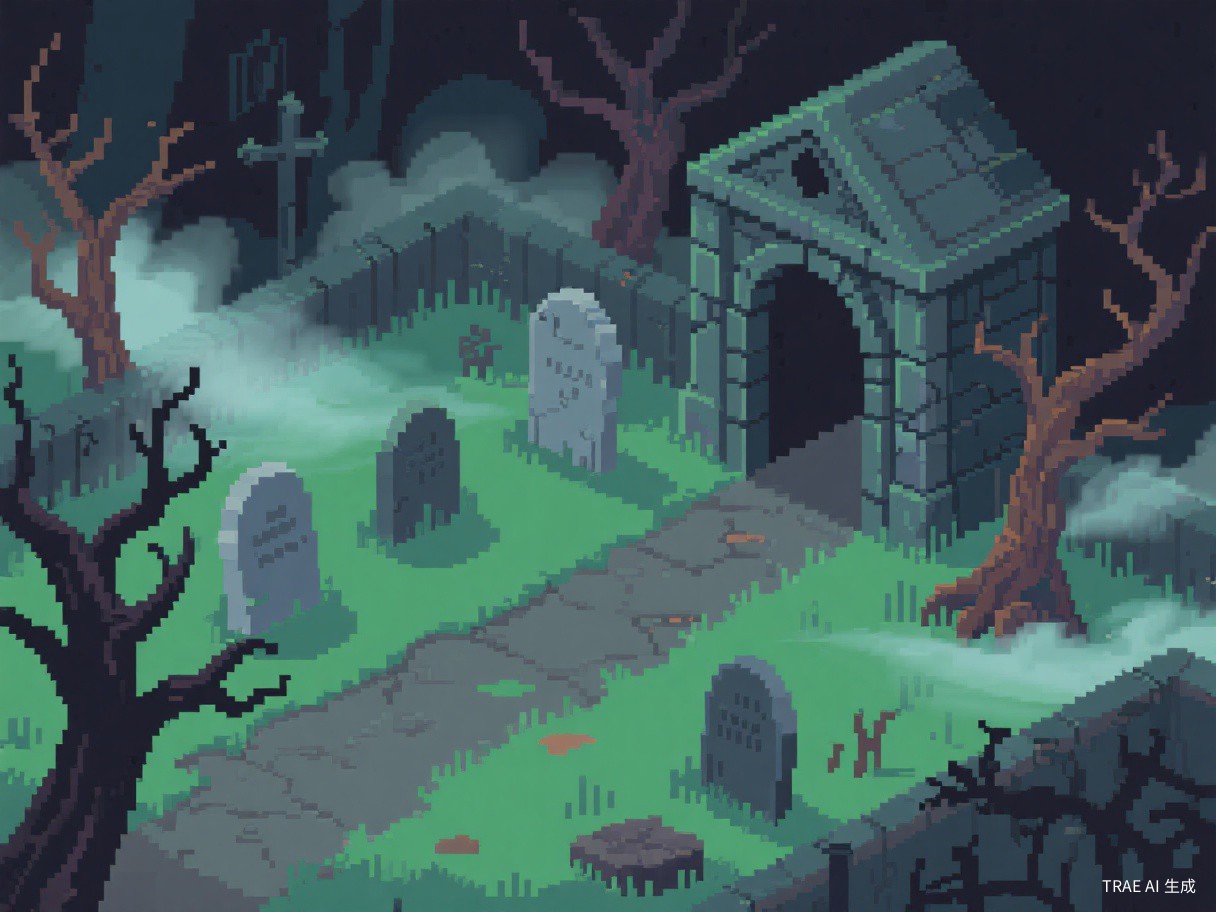 Cemetery Dungeon
Queensbury Crypt
DungeonQueensbury Crypt is a graveyard-themed dungeon blanketed in gloom. Crumbling headstones, decaying architecture, and shambling undead fill its corridors, while something far more sinister lurks in the deepest chambers. The atmosphere is thick with gothic dread, from the twisted stonework to the eerie ambient details woven into the environment.
The area culminates in a boss encounter against The Duchess of Queensbury, an eldritch monstrosity dwelling in the crypt's lowest level. Defeating her requires solid command of the burrow mechanic, as her attacks blanket large portions of the arena and leave little room to dodge above ground.
The Queensbury Crypt was once a peaceful cemetery where mourners from all parts of Tenebrous Isle found solace. That quiet peace was shattered when monsters began rising from their graves. The superstitious blame the overfilled cemetery, while others point to the Spark Generators' sudden malfunction as the source of the darkness.
- Cemetery and graveyard theme
- Undead enemy types
- Gothic architecture and tombstones
- Boss: The Duchess of Queensbury
- Eldritch horror atmosphere
Tips for Queensbury Crypt
- Use the burrow to dodge the Duchess's wide-area attacks
- Watch for tells before ground-targeted attacks
- Explore side paths for hidden Trinkets and Keygears
- Undead enemies may be weak to certain weapon types
Recommended
🎮 Play More Great Indie Games →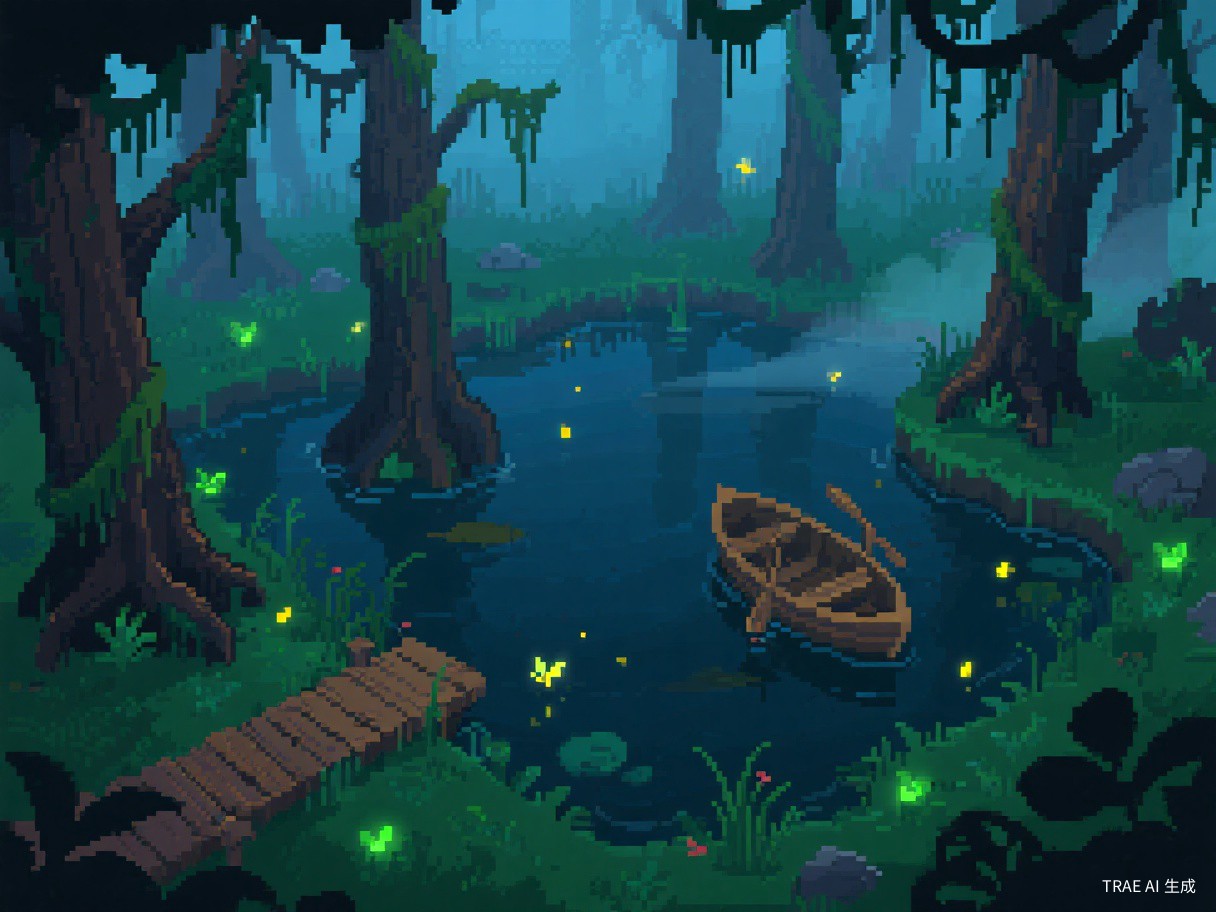 Swamp Area
Nox's Bayou
DungeonNox's Bayou is a semi-settled swamp reachable by boat not far outside of Ossex. Outsiders must be careful lest they sink into the bog and never surface again. The area features uneven ground, noxious deep water, and unfriendly flora and fauna. Lately, there have even been reports of an enormous predator lurking in the area, making navigation even more perilous.
Source: Official Wiki — Tenebrous Isle
Getting around the bayou involves plenty of platforming across open water and threading through dense undergrowth. The burrow ability is particularly handy here -- it lets you travel safely beneath submerged sections and slip past swamp hazards that would otherwise block your path.
- Swamp and bayou environment
- Boats and lilypads for traversal
- Murky water hazards
- Dense vegetation and wooden walkways
- Aquatic and insectoid enemies
- Boss: Nox Beast
Tips for Nox's Bayou
- The burrow can help navigate underwater sections safely
- Look for breakable objects near the water's edge for Sidearms
- Some paths may only be accessible by burrowing under obstacles
- Be cautious of enemies lurking just below the water surface
Hidden Boss: Mock Moon (June 10 Update)
- Location: Moonlit Path in Nox's Bayou. From Big Lagoon, take the left path across moving lily pads to a hidden tunnel.
- Shortcut: Before fighting, go to the bottom of Moonlit Path and lower the rope — this creates a shortcut back from Boat Bog Underlab.
- Preparation: Steady Soles trinket (Ossex fountain chest) eliminates water movement penalties for easier lily pad jumping.
- Phase 1: Standard attacks — learn patterns, avoid breaking candles.
- Phase 2: Arena darkens when health reaches red — preserved candles become the only light source.
- Recommended weapons: Blaststrike Maul (close-range), Battery Buster or Nightstar (ranged). Avoid Void Hatchet and Gyro Dagger.
- Reward: Iron Lung Trinket (extends burrow duration) + Mirror (teleport network connector).
- Difficulty note: Attack/Defense level 5+ recommended. Early attempts are possible but challenging.
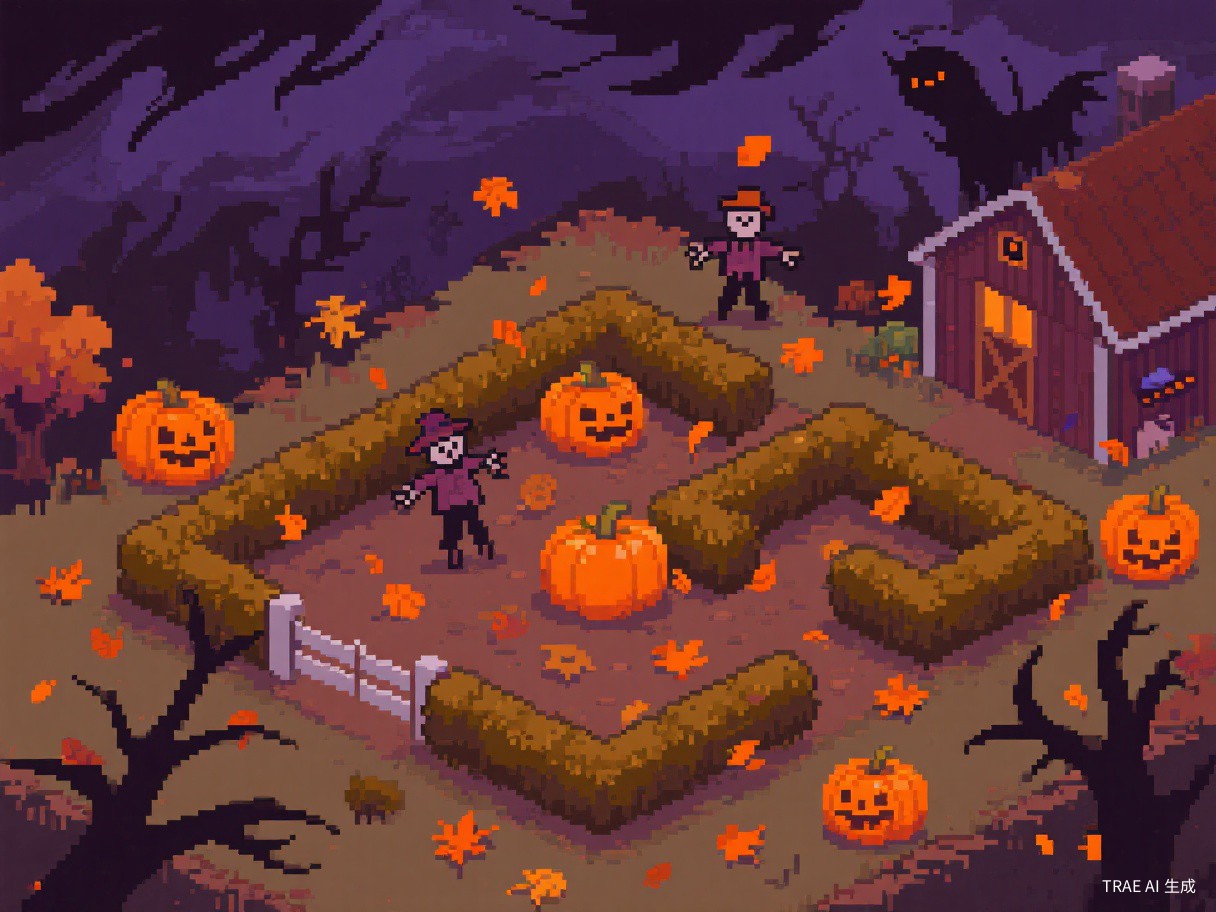 Autumn/Halloween Area
Septemburg
DungeonSeptemburg is a region locked in perpetual autumn, where crisp air and freshly fallen leaves conceal secrets both tantalizing and terrifying. Crops have taken on a life of their own, with some beginning to merge with forest wildlife, birthing unusually aggressive monstrosities. Peaceful farmers have succumbed to paranoia, fighting off tourists and turning unsuspecting folk into scarecrows. Even the weather feels discordant, with howling winds and bouts of lightning becoming increasingly commonplace.
Source: Official Wiki — Tenebrous Isle
Navigating the hedge mazes is a puzzle in itself -- the correct route is rarely obvious, and wrong turns can lead you in circles. Scarecrows scattered throughout the area may come to life as enemies or function as environmental traps, and the periodic lightning strikes seem to interact with the gameplay in ways that reward observant players.
- Autumn and Halloween theme
- Hedge maze navigation
- Dynamic lightning strikes
- Scarecrow enemies/hazards
- Orange and purple color palette
- Boss: Maxi
Tips for Septemburg
- Pay attention to lightning flashes -- they may reveal hidden paths
- Mark your path through hedge mazes to avoid getting lost
- Scarecrows may have attack patterns tied to lightning timing
- Explore thoroughly -- hedge mazes often hide valuable secrets
 Beach Mining Town
Bone Beach
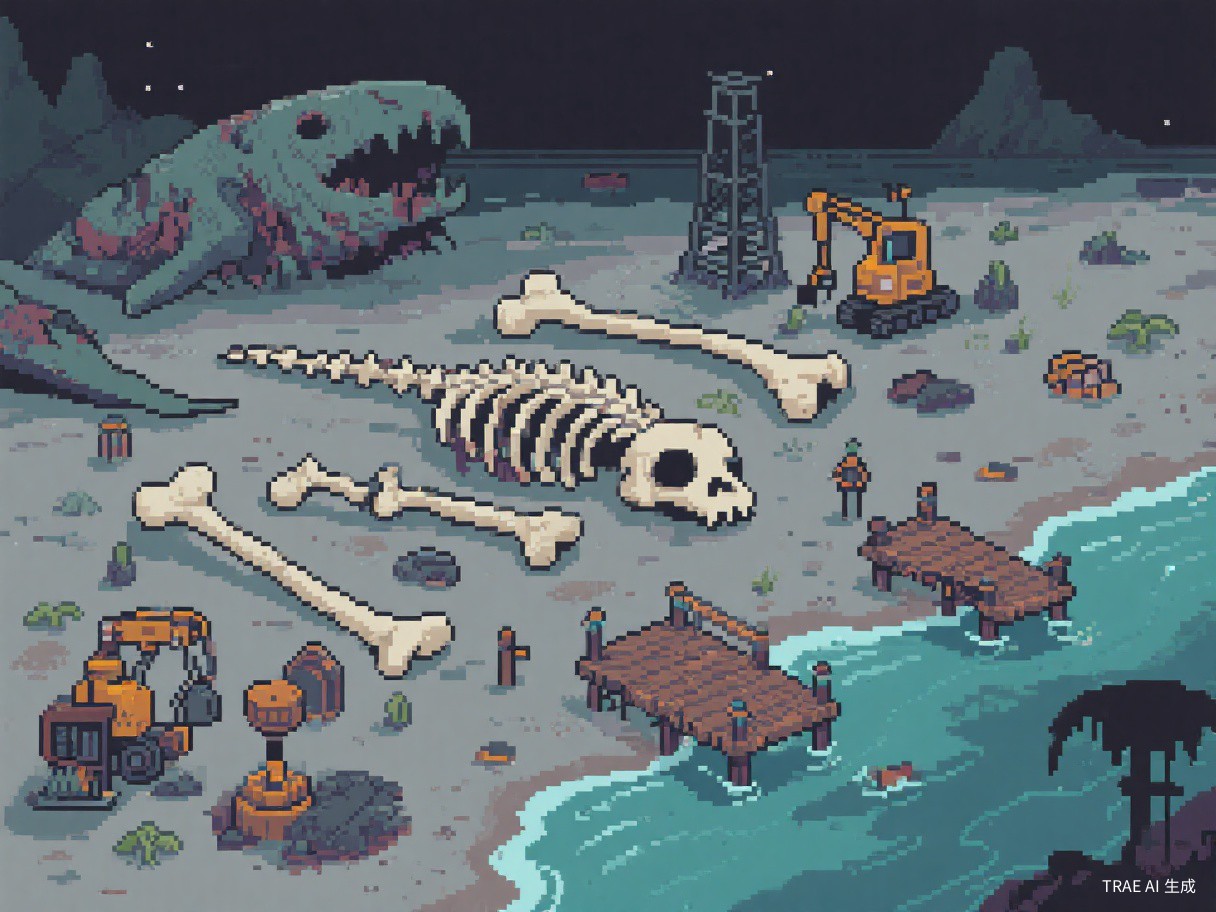
DungeonBone Beach is a mining town that has grown around a gargantuan decomposing creature. In a world where bones are currency, a beach laden with carcasses is like striking gold. It is a dangerous place, and navigating it will take you inside the creature and out. Local miners don't want you meddling, and viruses and other critters have set up camp too.
Source: Official Wiki — Tenebrous Isle
Conveyor belts are the defining traversal element here. They shuttle materials (and Mina) from one section to another, doubling as both a movement tool and a potential hazard if they carry you straight into danger. The mining theme hints at pickaxe-wielding foes and ore-related collectibles to discover.
- Mining town inside a giant creature
- Conveyor belt traversal mechanics
- Industrial mining aesthetic
- Organic cave architecture mixed with structures
- Unique interior-of-a-creature environment
- Boss: Madd House + Miner Dwarf Boss
Tips for Bone Beach
- Use the burrow to escape conveyor belts carrying you toward hazards
- Conveyor direction can be used strategically for speedruns
- Look for breakable walls near conveyor endpoints for hidden rooms
- The interior environment may have organic weak points to burrow through
 Ice/Snow Area
Frozen Trainyard
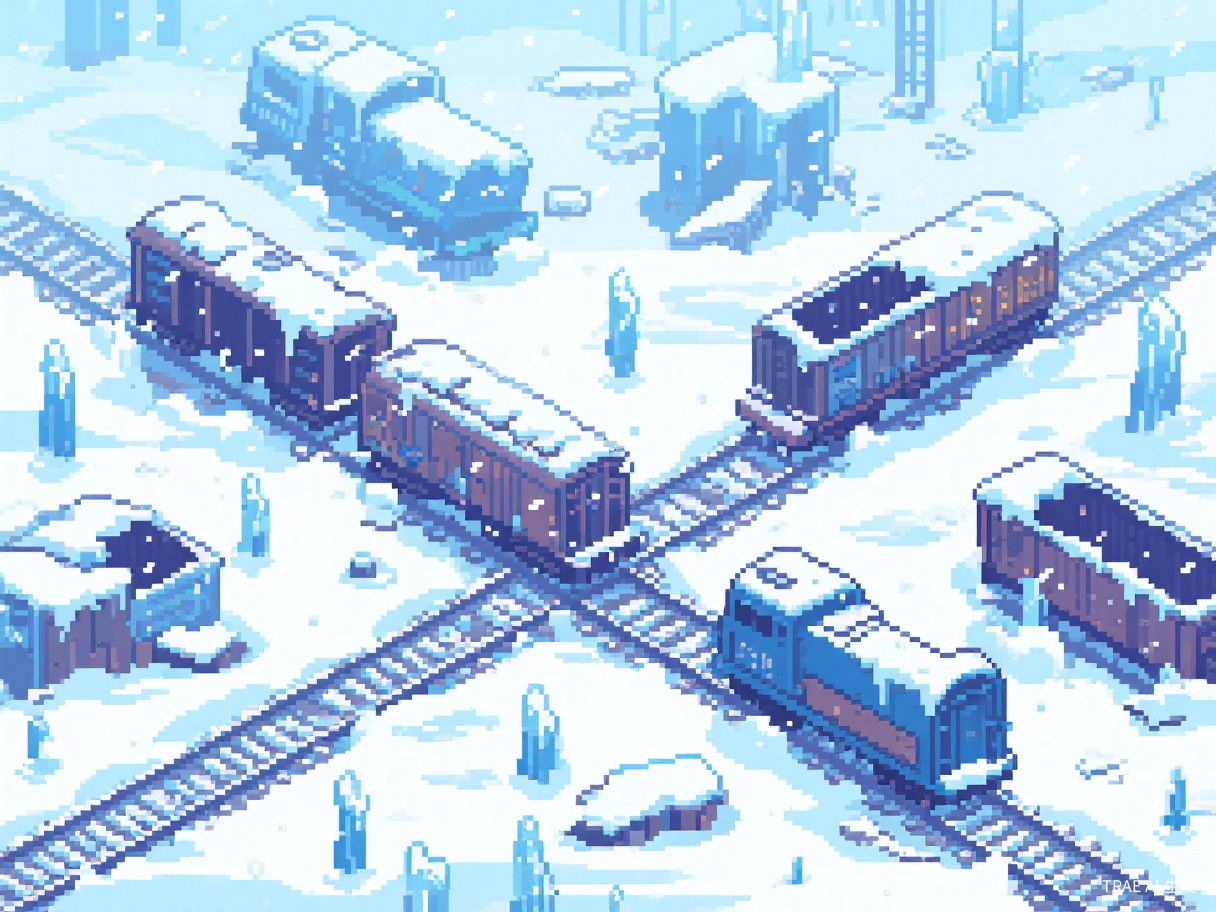
DungeonFrozen Trainyard is a frigid wasteland that Mina reaches by traveling north on a train. It is a graveyard of overturned railcars, fraught with icy enemies and the ghosts of passengers who linger after a terrible accident. The standout mechanic here is fragile ice -- certain floor tiles crack and collapse after you step on them, creating tense, Celeste-inspired platforming puzzles.
Because some tiles can only be crossed once before giving way, navigation becomes a careful exercise in planning. You may need to identify which platforms are safe, which are temporary, and whether burrowing underground can bypass a fragile section entirely. The slippery ice physics add another layer of challenge, affecting both Mina and the enemies that inhabit the trainyard.
- Ice and snow environment
- Fragile ice tiles (Celeste-like puzzles)
- Trainyard industrial setting
- Frozen tracks and platforms
- Slippery surface physics
- Boss: Brain Boss + Snow Mountain Bosses
Tips for Frozen Trainyard
- Plan your route carefully -- ice tiles may only hold once
- The burrow can bypass fragile ice sections entirely
- Look for solid ground markers to identify safe paths
- Ice physics may affect enemy movement too -- use this to your advantage
 Cosmic Installation
Astral Orrery
DungeonAstral Orrery is a mysterious installation floating high above Tenebrous Isle, on the edge between worlds known and unknown. Its Spark Generator naturally reacts with the Astral Ore buried in the valley below, causing the entire installation to float sparkmagnetically in perfect equilibrium. Little is known about the Scholars who reside inside its heliocentric halls, or what they are researching.
Source: Official Wiki — Tenebrous Isle
With its late-game feel, the Astral Orrery is expected to test everything you have learned so far. The platforming is likely among the most demanding in the game, and the enemies encountered here may include types unique to the cosmic setting. Scholars and sparkmagnetics tied to the orrery's purpose hint at deeper lore connections waiting to be uncovered.
- Floating astronomical installation
- Cosmic and celestial theme
- Zero-gravity or reduced gravity sections
- Clockwork and planetary mechanics
- Otherworldly visual design
- Boss: Congulant (one of the toughest fights)
Tips for Astral Orrery
- Consider tackling this area later when you have more upgrades
- Floating platforms may require precise burrow timing
- Cosmic enemies may have unusual attack patterns -- observe before engaging
- Look for astronomical alignments that could reveal secret paths
Western Wilds
TransitionWestern Wilds is a transition area that connects Ossex to the Molten Foundry via the Occupied Bridge. This rugged wilderness region features open terrain and serves as the gateway to the western reaches of Tenebrous Isle. The Occupied Bridge within this area is controlled by hostile forces, adding combat challenges to the traversal.
- Transition area connecting Ossex to Molten Foundry
- Contains the Occupied Bridge (hostile-controlled)
- Open wilderness terrain
- Connection path: Western Wilds → Occupied Bridge → Molten Foundry → Upper Ossex
Molten Foundry
TransitionThe Molten Foundry is a high-temperature smelting facility area that serves as a transition zone between the Western Wilds and Upper Ossex. This industrial region features significantly higher enemy density than preceding areas, with enemies configured around the smelting facility theme. The terrain is complex, combining platform jumping sections with dangerous heat wave traps that test players' mastery of movement under environmental pressure.
- High-temperature smelting facility theme
- High enemy density (notably more than preceding areas)
- Platform jumping sections
- Heat wave traps
- Complex terrain with environmental hazards
- Connection: Western Wilds → Occupied Bridge → Molten Foundry → Upper Ossex
Upper Ossex
Town UpperUpper Ossex is the upper district of the main town, accessible through the Molten Foundry. This area features a more diverse range of enemy types compared to the foundry, with a noticeably slower pacing that serves as a rhythm adjustment zone. The upper district provides additional exploration opportunities and connects to further areas of Tenebrous Isle.
- Town upper district area
- More diverse enemy types than Molten Foundry
- Slower pacing -- rhythm adjustment zone
- Additional exploration and secrets
Kindlewood / Overgrowth
ExplorationKindlewood / Overgrowth is a northwest jungle-themed exploration area on Tenebrous Isle. Dense vegetation and overgrown paths characterize this region, offering a distinct visual and gameplay contrast to the industrial and gothic areas of the island. The area features a unique wind mechanic that affects Mina's jumping trajectory, adding an extra layer of challenge to platforming. Thunderstorm weather in this area causes actual damage to the player, making navigation hazardous during storms.
The Carving Man makes his first appearance here. At this stage, he is invincible and cannot be attacked -- players must push him to the end of the area where a story event unlocks his true role. This is a scripted encounter, not a boss fight.
- Jungle / overgrowth theme (northwest area)
- Wind affects jumping trajectory
- Thunderstorm weather deals actual damage
- Carving Man first appearance (invincible, must push to area end)
- Exploration-focused with dense vegetation
Tips for Kindlewood
- Account for wind direction when making jumps
- Seek shelter during thunderstorms to avoid damage
- Don't try to fight the Carving Man -- push him to the area's end
- The story event at the end unlocks his true role
Hollowers' Guild
Key LocationThe Hollowers' Guild is a critical functional area essential for progression. Located to the right of Ossex's main gate, the entrance is hidden -- you must break boxes on the building's right side to find a way in. Inside, you'll find Muriel who provides information about Rhene's capture.
After rescuing Rhene from the southern outskirts and escorting her back to the guild, Drillhardt can be summoned by attacking the vines blocking his room 3 times. Drillhardt sells the map for 500 Bones and an enhanced version for another 500 Bones that tracks collectibles per area. He also offers upgrade services including the Sidearm Recoverer.
- Location: Right of Ossex main gate, break boxes to enter
- Unlocked after rescuing Rhene
- Drillhardt sells map (500 Bones) and enhanced map (500 Bones)
- Additional upgrade services available
- Map can only be viewed in your Underlab
Accessing the Guild
- Go right from Ossex's main gate
- Break the boxes on the right side of the building
- Enter through the revealed passage
- Talk to Muriel inside (burrow through north wall hole)
Loner's Landing
TutorialLoner's Landing is the game's opening linear area where the adventure begins after Mina's shipwreck. This tutorial zone introduces core mechanics including movement, combat, and the burrow ability in a controlled environment before the game opens up into the full non-linear world.
The area culminates in a boss fight against the Nether Kraken, a massive sea creature. Defeating it rewards the Uranium Bracelet trinket. Three Vial Pouches found here are story-related and cannot be missed. Later in the game, players can return to the ship via a secret train path from Backwaters to collect additional items and secrets.
- Linear tutorial area -- game starts here after shipwreck
- Boss: Nether Kraken (rewards Uranium Bracelet)
- 3 Vial Pouches (story-related, unmissable)
- Later accessible via secret train path from Backwaters
- Return visit grants additional collectibles
Tips for Loner's Landing
- Pay attention to the tutorial prompts to learn burrow timing
- The Nether Kraken fight teaches core dodge-and-punish patterns
- Return later via Backwaters train secret path for extra collectibles
Eastern Heath
ExplorationEastern Heath is the first area encountered when exiting northeast from Ossex. This lush region features a cave NPC who sells the Willow the Wisp trinket. A secret underwater passage hides a Mimic enemy that drops a Kear upon defeat. The Axe Sidearm can be found behind a barrier on the first screen, providing an early weapon upgrade for players who explore thoroughly.
- Northeast exit from Ossex -- first explorable area
- Cave NPC sells Willow the Wisp trinket
- Secret underwater passage with Mimic enemy (drops Kear)
- Axe Sidearm behind barrier on first screen
Tips for Eastern Heath
- Check the cave early for the Willow the Wisp trinket
- Explore the underwater passage for a free Kear from the Mimic
- The Axe Sidearm behind the barrier is worth finding early
Backwaters
ExplorationBackwaters is a waterway region featuring shops and the game's fishing system. The fishing rod is obtained here -- from the second screen, take the path going right at the top right and use a key to open the blocking path. A cutscene shows an NPC being eaten by a giant fish, after which you can pick up the rod. The area also contains a secret path that leads to Loner's Landing's ship, allowing players to return to the tutorial area for additional collectibles.
- Waterway area with shops and fishing system
- Fishing rod obtained here (second screen, top right path)
- Secret path to Loner's Landing's ship
- Key required to access fishing rod location
Tips for Backwaters
- Get the fishing rod early -- it unlocks a minigame and collectible fish
- If you lose the fishing rod, destroy candles near the Underlab entrance to get it back
- Use the secret path to return to Loner's Landing for extra collectibles
Coltrane Peak
DungeonColtrane Peak is a snow mountain area accessed by riding the train from Ossex. The train ticket costs 10,000 Bones, making it a significant investment. The journey from the hub to the snow area takes under one minute by train. This area is recommended to be completed before Bone Beach to build up your stats for the higher-difficulty mining town. The train and mirror systems are separate fast travel networks.
Mina travels north by train into a graveyard of overturned railcars, fraught with icy enemies and the ghosts of passengers who linger after the terrible accident.
Source: Official Wiki — Tenebrous Isle
- Snow mountain area reached by train from Ossex
- Train ticket costs 10,000 Bones
- Recommended before Bone Beach for stat upgrades
- Separate fast travel from the mirror network
Tips for Coltrane Peak
- Save up 10,000 Bones before attempting to ride the train
- Complete this area before Bone Beach for smoother difficulty progression
- The train ride is quick -- under one minute from hub to snow area
Secrets & Hidden Paths
Confirmed exploration secrets and hidden content
Exploration Tips from Reviews
Mina the Hollower is packed with secrets hidden in plain sight. The game features over 1,200 unique screens to explore, with hidden paths accessible from the very start using Mina's full moveset. Key secrets confirmed by reviewers include:
- ▸ Breakable Walls: Many walls throughout the world can be destroyed to reveal hidden rooms, upgrades, and optional bosses. Smash everything you see.
- ▸ Burrow Through Walls: The Wall Burrow Trinket lets Mina burrow through certain walls, opening entirely new exploration paths.
- ▸ Sidearm Secrets: Some areas can only be accessed by using specific Sidearms (like the Iron Steed to jump over huge gaps).
- ▸ No Detailed Map: The game intentionally does not provide a room-by-room map, making secret discovery more challenging and rewarding.
- ▸ Underlab Map: Underlabs can be outfitted with a rudimentary map that tracks collectibles by region.
- ▸ Point of No Return: The game has a clearly labeled point of no return before the final area, allowing you to complete 100% before ending.
- ▸ Carry Ladders: You can pick up and carry ladders to place them elsewhere, revealing hidden paths (confirmed by Polygon reviewer).
- ▸ Mirror Teleportation Network: Mirrors throughout Tenebrous Isle are not just decorative props -- they form a connected teleportation network. Discovering and using mirrors can unlock shortcuts and hidden paths across the island. [CONFIRMED]
- ▸ Western Wilds Bridge Boss: An optional mini-boss occupies a bridge in the Western Wilds area. This encounter can be found early when traveling from Nox's Bayou toward the western regions. [CONFIRMED]
- ▸ Septemburg Trapped Children: In the Septemburg area, you will find children trapped in dungeons. You can choose to search for and rescue them. If you do not save them, there will be negative consequences later in the game. GameSpot editors who skipped this regretted it. [CONFIRMED]
- ▸ Recommended Dungeon Order: While the game is fully non-linear, Yacht Club Games officially recommends: Northeast (Queensbury Crypt) first for the Proto Spark trinket, then Southwest, Northwest, and finally Southeast. This order provides the smoothest difficulty curve. [CONFIRMED]
- ▸ Blacksmith Armand Boss Fight: On your second purchase at Legovich's Smithy in central Ossex, the blacksmith Armand challenges you to a fight. This is a hidden boss with "hidden boss level" difficulty. He has extreme damage reduction — use the burrow to redirect lava onto him to remove his defense. Winning unlocks the full blacksmith shop. [CONFIRMED]
- ▸ Four Small Animals Quest: Find four small animals scattered throughout Tenebrous Isle (the first is a small goat) to earn the Lightning Grip trinket. This is a collectible quest that requires exploration across multiple areas. [CONFIRMED]
- ▸ Kite by the River: In the middle of the map, near the river, a person is flying a kite. Knock the kite down to receive the Accident Charm trinket. [CONFIRMED]
- ▸ Elizabeth's Hidden Garden: In the northern part of Tenebrous Isle, find Elizabeth in a hidden garden. Complete her quest to receive the Deboning Wand trinket. Nearby, go past the wall to find a chest containing the Guardian Beast Stone trinket. [CONFIRMED]
- ▸ Pingji Salon Shop: A shop in Ossex that sells the Spark Catcher trinket and provides a ladder needed to reach the Dodge Powder trinket on a high rooftop. [CONFIRMED]
- ▸ Jopp's Car Breaking Task: At Jopp's small shop, find the Car Breaker NPC and complete a car-breaking task to earn the Chain Capacitor trinket. [CONFIRMED]
- ▸ Furr's Quest (Ossex Main Street): Complete Furr's quest on the town's main street to receive the Valor Medal trinket, which allows slow movement while healing and prevents Plasma loss when hit. [CONFIRMED]
- ▸ Molten Foundry Poppit Shop: A Poppit merchant at a stall in the Molten Foundry sells the Fairy Helio trinket, which summons a healing fairy each time Mina takes damage. [CONFIRMED]
- ▸ Hidden Ending (Lionel's Judgment): A secret ending discovered by YouTuber ChickenSoup requires completing the game without giving Lionel any reason to condemn Mina. Key restrictions include: do NOT defeat Mock Moon, do NOT break any lamps or candles, do NOT use the train except for first Coltrane Peak visit, do NOT seal the Duke in the basement, do NOT pet the old man's monster dog in Sandfalls, do NOT kick the can when children ask, do NOT attack the rabbit monster when children ask, do NOT buy from Osmund, do NOT fish (do NOT even obtain the fishing rod), do NOT talk to the Scribe, do NOT buy hot dogs, do NOT buy from Count Dr. Teleceae, do NOT harm Wanda, do NOT rest at mine campfires, do NOT enter the Stove area, do NOT steal, do NOT break Tybalt's things, do NOT buy ammo or repair at Tybalt's, do NOT use weapons in the tower. Additional restrictions confirmed: do NOT watch the opening ribbon-cutting ceremony, do NOT talk to Klumpy-Dee, do NOT restore the Hollower's Guild, do NOT harm any conscious leaves or other characters. You MUST rescue Septemburg's 3 children, give bones to all beggars, and ask Cappy to accompany you after the shipwreck. Reward: Lionel invites you to join his expedition, different credits sequence and new post-credits scene. [CONFIRMED - Source: Polygon, 17173.com, 9game.cn, June 9-12, 2026]
- ▸ Beastium Trinkets Set: Collecting all Beastium-type trinkets and equipping them triggers special interactions. These trinkets are a subset of the game's 69 total trinkets. The full set of Beastium trinkets and their effects are still being documented. [PARTIALLY CONFIRMED - Source: YouTuber ChickenSoup via Polygon]
Mirror Fast Travel System
The teleportation network across Tenebrous Isle
How the Mirror Network Works
Tenebrous Isle contains 7 mirrors that form a connected teleportation network to the Astral Orrery. 6 mirrors require you to walk into them and stand still for a few seconds to teleport. The 7th mirror is the exit from the Astral Orrery generator room. The mirror in Radiant Manor serves as the main entrance to Astral Orrery's front door.
To fully unlock the mirror network, you must find and activate switches inside the mirrors to flip platforms, creating a path to the Mirror's End hub area. This hub connects all mirror destinations and serves as a central fast travel node.
Known Mirror Locations
- 1. Early Candle Wall Passage: Found behind a breakable candle wall in an early area.
- 2. Nox's Bayou (Mock Moon): After the Mock Moon boss, follow an NPC into the mirror.
- 3. Crow Town (Southwest House): In the southwest corner house. Burn leaves and use a crow to break through the door.
- 4. Stomach Caves (Bug Back Tent): Found inside a tent on a bug's back in the Stomach Caves area.
- 5. Frozen Horror (North Tunnel): After defeating the Frozen Horror, head north through the tunnel.
Mirror System Tips
- The train and mirror systems are separate fast travel networks
- Stand still inside a mirror for a few seconds to trigger teleportation
- Activate internal switches to flip platforms and unlock Mirror's End hub
- The Radiant Manor mirror is the main entrance to Astral Orrery
Septemburg Children Rescue
A critical hidden quest with lasting consequences
Save the Children of Septemburg
In the Septemburg area, players will discover children trapped in dungeons. This is a hidden quest that can easily be missed if you rush through the area. The choice to rescue or ignore these children has lasting consequences that affect the game's story and ending.
Warning: If you do not save the children, there will be negative consequences. GameSpot editors who skipped this quest explicitly stated they regretted it. It is strongly recommended to take the time to thoroughly search Septemburg's dungeons and rescue every child.
Rescue Tips
- Thoroughly explore every dungeon room in Septemburg
- Look for hidden passages behind breakable walls
- Some children may require specific Kears or abilities to reach
- Complete this quest before finishing the game to avoid negative consequences
Recommended Area Progression Order
Community-recommended sequence for smooth difficulty progression
Optimal Exploration Order
While Mina the Hollower is fully non-linear and all areas can be tackled in any order, the community has established a recommended progression order based on the game's newspaper hints and difficulty curve. Following this order ensures a smooth difficulty ramp and access to key items before tackling harder zones.
- 1. Queensbury Crypt — Beginner-friendly area. Obtain the Proton Spark revival trinket early, which provides a safety net for the rest of the game.
- 2. Backwaters + Nox's Bayou — Practice burrow jumping precision in these areas. The water-based traversal and swamp hazards help hone movement skills.
- 3. Kindlewood + Septemburg — Major difficulty jump with new enemy types surging. Watch for the Carving Man's first appearance (invincible -- must push to area end). Save the trapped children in Septemburg.
- 4. Coltrane Peak — Reach via train from Ossex (10,000 Bones ticket). Complete this before Bone Beach to build up stats and equipment.
- 5. Bone Beach — Requires upgraded attack and defense stats. The conveyor belt mechanics and tough enemies demand solid build investment.
- 6. Frozen Trainyard + Astral Orrery — Final areas. Fragile ice puzzles and cosmic platforming test everything you have learned. Tackle these last.
Map Acquisition
How to get the map in Mina the Hollower
Getting the Tenebrous Isle Map
The map is not available from the start. To acquire it, you must complete an escort quest to rescue Rhene and Drillhardt from the Hollower's Guild.
- 1. Enter Hollower's Guild: Located right of Ossex's main gate. Break boxes on the building's right side to find an entrance.
- 2. Talk to Muriel: Inside, burrow through a hole in the north wall. She tells you they went south through the burned town.
- 3. Bring a Kear: You need at least one Kear (key) before leaving Ossex.
- 4. Head South from Ossex: Go left at the stairs, unlock the north path with a Kear, defeat enemies, and press the button to retract spikes.
- 5. Enter the Yellow Door: Marked with "1", inject a Plasma Vial to open it.
- 6. Find Rhene: Rhene was captured by Thorne's forces and is held in a building in the southern outskirts. Navigate through the building to reach her.
- 7. Heal Rhene: Use a Plasma Vial to heal her. Clear enemies and press buttons (including hidden ones requiring burrowing) to progress.
- 8. Escort Rhene Back: Rhene cannot burrow and can only jump 1 tile. If she takes damage, she panics and spins in circles -- clear all threats first, then go back to find her. In the final room, burrow through the wall to trigger a switch that removes spike traps. Go upstairs and guide her around the rotating iron ball obstacle.
- 9. Return to Guild: Escort Rhene back to the Hollowers' Guild safely.
- 10. Summon Drillhardt: Attack the vines blocking his room 3 times to call him out.
- 11. Buy the Map: Purchase the map from Drillhardt for 500 Bones. An enhanced version (500 Bones) tracks collectibles per area. The map can only be viewed in your Underlab.
Bone Farming
Efficient Bone grinding routes
Knight's Rest Farming Route
An efficient early-game Bone farming route exists at Knight's Rest in the Mourner's Mile area, east of Ossex. This route exploits the Underlab reset mechanic: entering and leaving an Underlab respawns all enemies and breakable objects.
- ▸ Simple Route: From the northern Underlab entrance near Knight's Rest, head right to find 3 Bone-filled boulders. Smash them, return to Underlab, repeat. No combat required.
- ▸ Advanced Route: Defeat Armored Knights, smash boulders, extend east to the Queensbury Crypt entrance's second Underlab. Reset and fight back along the full route for maximum Bones.
- ▸ Trinket Synergy: The Deboning Wand trinket boosts Bone drops by ~50% (but scatters them). Best used in flat, safe farming areas.
Difficulty Modifiers / Assist Settings
Customizable difficulty options in Settings > Modifiers/Assist
Mina the Hollower features a comprehensive set of difficulty modifiers accessible from Settings > Modifiers/Assist. These can be combined to create a customized experience ranging from casual exploration to extreme challenge.
| Easier Options | Effect |
|---|---|
| 0.5x Damage Taken | Take half damage from all sources |
| Boss Checkpoint | Save point before every boss fight |
| Quick Heal | Faster healing during combat |
| More Plasma | Increased plasma recovery from attacks |
| No Bone Loss on Death | Keep all Bones when dying |
| Harder Options | Effect |
|---|---|
| 1.5x Damage Taken | Take 50% more damage (extreme option also available) |
| +20% Bone Upgrade Cost | All upgrades cost 20% more Bones |
| Less Plasma | Reduced plasma recovery from attacks |
Septemburg Area — Detailed Route (June 12 Update)
Septemburg is a large area with a distinct narrative progression through its sub-locations. The area names tell a story of ecological collapse: Withered Farms (plant decay) → Rotten Barn (food storage rot) → Crow Town (scavenger settlement). The area also connects to Mirror's End (an Astral Orrery sub-area), Tangled Woods, and Stormwatch Way. The area culminates in a Dungeon Boss fight and the Spark Tower, which may be a reboot mechanism for the area's energy.
- ▶ Withered Farms: Entry point —枯萎的农场, weakened enemies, introduction to the area's decay theme.
- ▶ Rotten Barn: 腐烂的谷仓 — interior area with stronger enemies and environmental hazards.
- ▶ Crow Town: 乌鸦镇 — NPC settlement with shops and quest opportunities. Features a children rescue side quest (3 children, rewards a trinket).
- ▶ Mirror's End: Astral Orrery sub-area — late-game route requiring precise room navigation and route reversal.
- ▶ Tangled Woods → Stormwatch Way: 纠缠树林 → 暴风瞭望路 — transitional areas leading to the dungeon.
- ▶ Dungeon Boss → Spark Tower: Area climax — defeat the dungeon boss, then access Spark Tower (火花塔).
All 17 Areas — Exploration Overview (June 12 Update)
The game world consists of 17 main areas with non-linear exploration. Key exploration tips: check suspicious dead-ends for breakable walls, test burrow on suspicious floors, revisit areas after gaining new sidearms, observe unusual textures, and mark unreachable points for later revisits. The game encourages ability-gating and backtracking — obtain the Bellows Bustle (air dash) for late-game full collection.
Game Scale & Progression Data
Key statistics and progression information
Mina the Hollower is a substantial game with a large amount of content. Below are key statistics about the game's scale, progression systems, and current version status.
| Category | Details |
|---|---|
| Total Areas | 17 areas |
| Total Bosses | 28 bosses |
| Total Trinkets | 69 trinkets |
| Main Weapons | 5 main weapons |
| Sidearms | 14 sidearms |
| Average Completion Time | 20-30 hours (72% completion in ~23-24 hours) |
| New Game Plus | Supported up to NG+7 |
| Steam Peak Online | 8,017 players |
| Current Version | v1.0.5 |
Progression Order — Key Tips
Updated recommendations for smooth difficulty progression
While the game is fully non-linear, the following tips from community guides will help ensure a smoother experience, especially for first-time players.
- ▶ Coltrane Peak — 10,000 Bones Train Ticket: Coltrane Peak requires a 10,000 Bones train ticket to access. It is strongly recommended to complete this area before Bone Beach to build up your attack and defense stats.
- ▶ Bone Beach — Significant Difficulty Spike: Bone Beach has a major difficulty spike compared to preceding areas. Make sure your attack and defense stats are sufficiently upgraded before attempting this mining town. The conveyor belt mechanics and tough enemies demand solid build investment.
- ▶ Carving Man in Kindlewood — Do Not Fight: The Carving Man is invincible on first encounter in Kindlewood. Do not attempt to fight him — instead, push him to the end of the area where a story event unlocks his true role. This is a scripted encounter, not a boss fight.
June 22 Daily Update — New Confirmed Secrets
Additional secrets and tips confirmed through recent gameplay guides
Mirror System & Astral Orrery Access
The Mirror system is crucial for accessing the Astral Orrery. Players must enter every mirror they find throughout Tenebrous Isle to activate switches inside. Each mirror contains a switch that flips platforms, creating a path to the Mirror's End hub area. Only after activating all mirror switches can players fully unlock the Astral Orrery, where one of the six Spark Generators is located. [CONFIRMED - Source: 7xz.com guide, June 2026]
- ▶ Enter every mirror: Each mirror has a switch inside — don't skip any.
- ▶ Stand still in mirrors: Hold position for a few seconds to trigger teleportation.
- ▶ Mirror's End hub: Connects all mirror destinations for fast travel.
World Map & Key Locations
The World Map is obtained by rescuing Rhene and summoning Drillhardt at the Hollowers' Guild. The base map costs 500 Bones and shows the world layout. An enhanced version for another 500 Bones tracks collectible completion per area. The map can only be viewed in your Underlab. [CONFIRMED - Source: 163.com, 7xz.com, June 2026]
Beggars in Ossex: There are 7 beggars throughout Ossex. Giving them Bones provides hints and directions. Donating to all 7 is required for the hidden ending. Some beggars reveal puzzle solutions that help progression. [CONFIRMED - Source: 7xz.com guide, gcores.com review]
Candle Breaking: Breaking candles throughout the world drops energy points for sidearms. Even when energy is full, break candles — some drop healing items or sidearm charges. A few candles are guaranteed to drop energy potions. [CONFIRMED - Source: 7xz.com guide]
Assist Settings — 177 Options
The game features an impressive 177 assist options in the settings menu. These include standard modifiers like infinite HP and one-hit kills, as well as more unusual options like screen rotation, world speed adjustment, and individual enemy speed tuning. This is one of the most comprehensive assist systems in modern gaming. [CONFIRMED - Source: gcores.com review, 100pguides.com]
DLC & Update Information
Post-launch plans and future content
Information about post-launch plans for Mina the Hollower, sourced from developer interviews.
- ✓ No Free DLC Planned: Yacht Club Games has confirmed in an interview that there are currently no plans for free DLC. The game launches as a complete package.
- ✓ Small Optimization Updates: Small optimization updates are planned. A random mode may be added in a future patch, though details are not yet finalized.
- ✓ Sequel in Conceptual Stages: A sequel is already in conceptual stages. Hidden Easter egg hints in the game tease the direction of the next installment. No release timeline has been announced.